Instructions for using Sever Monitoring serviceAfter you have registered the service. To be able to use the service, you must access the members account via the following URL:
https://my.centerhop.com/clientarea.phpAfter you login to the members page, click on Service [1] then select Server Monitoring [2].
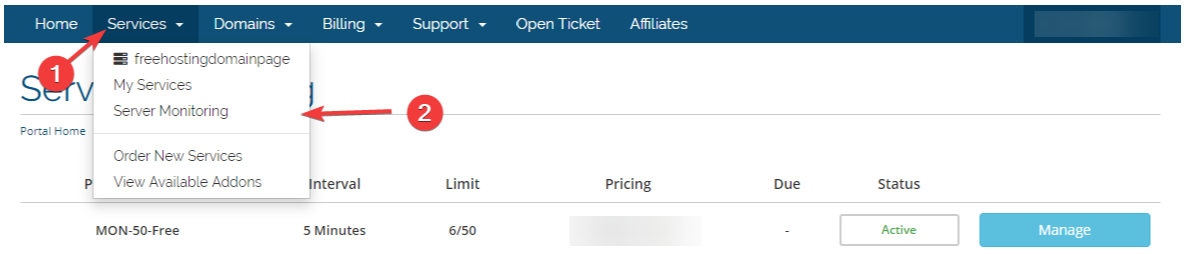
On the Monitoring server page, It displays the products you have registered then you click Manage to access to Server Monitoring service.

To add a Monitor, click the Add Monitor button on the My Monitors page.

When you choose to perform keyword monitoring, you can configure the following form:
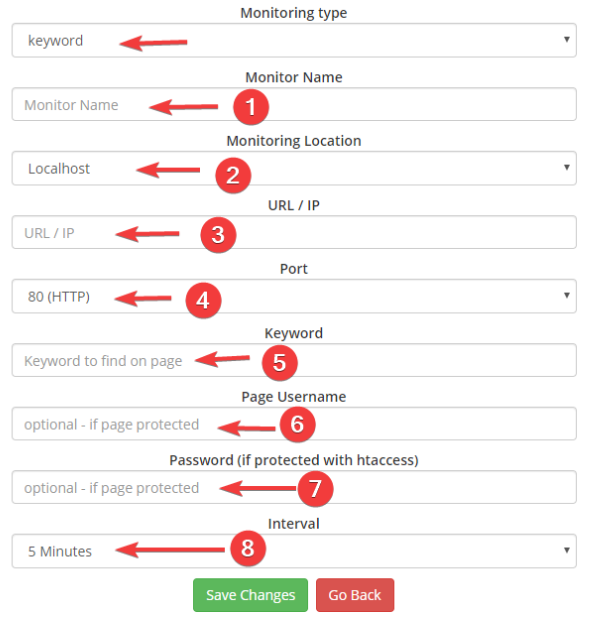
Monitor Name [1]: Your hostname for this Monitor
Monitor Location [2]: The default option is localhost
URL/IP [3]: You can use your domain name or server IP address to Monitoring
Port [4]: You select one of the ports to conduct monitoring, for example on the picture is port 80 for HTTP service (web)
Keyword [5]: The characters appear on the Website, FTP site, .. of the server. In case the above characters do not appear, the system will report downtime
If you use htaccess authentication, you can enter more information into [6], [7] because this is an options so you do not need to configure this problem.
Page Username [6]: You enter the authentication name information
Password (if protected with htaccess) [7]: You enter the password authentication information .htpasswd file here
Interval [8]: After a period of time (5 minutes, 10 minutes,..), the system will respond to the status of the server
After the configuration is complete, you click on Save Changes to save the configuration